The other day I posted an introductory article to Hyperion Planning, and I mentioned at the time that I'd go through how to set up the standard demo. The version of Planning I'm working with is Hyperion Planning 11.1.1.1.0, Fusion Edition as downloadable from OTN.
Getting started with Planning is a little bit confusing at the start, as Planning doesn't initially appear on the EPM Workspace application menu:
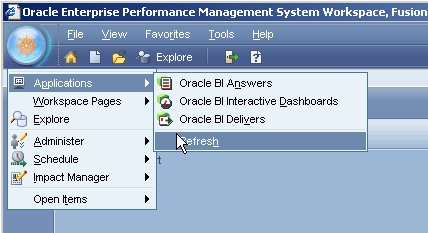
In fact, Planning does eventually appear on this menu but only after you've defined your first Planning application, which is a bit confusing. You can get to Planning by its own direct URL, which in my case is http://localhost:8300/HyperionPlanning/, but as you can see in the screenshot below you still can't log in as there are no applications defined.

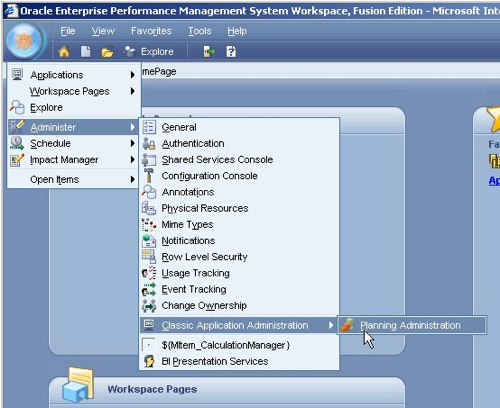
So to start working with Planning you need to first create an application, which you can do either through the Classic Application Wizard which I'll show in a moment, or through the EPM Architect application that Oracle introduced with 11.1 which allows you define both Planning and Financial Management applications. Unfortunately EPM Architect needs IIS to run and so we'll start off with the old-school Classic Application Wizard, which you actually access from back in EPM Workspace, using the Administration menu.
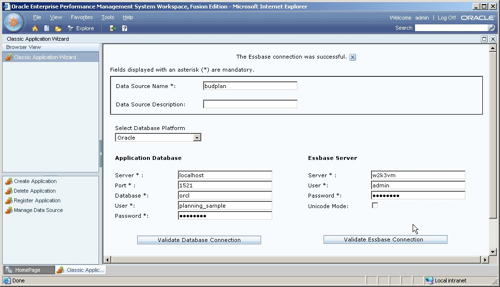
This then brings up the Classic Application Wizard that takes us through the "old" way of creating Planning applications. The wizard then takes us through two main steps; the first to define what's called the "data source", which is where you enter the details of a relational database schema to put the planning metadata in, and an Essbase server thats going to hold your Essbase application and database(s).
For the relational connection I put in the details of an account that I just set up to hold my metadata (at this moment, empty), whilst for the Essbase server I just point it towards the one on my virtual machine.
One the data source is created, I then click on a button to create the Planning application. This takes me through a five stage wizard, where I firstly name the application, assign it to a Shared Services application group I created earlier, and crucially tick the "Sample Application" box so that it sets up the sample application, bypassing a lot of the steps and seeding the application with all the required metadata including dimension information and the forms that will be used for data entry.

At this point I can just press Next and then Finish to create the sample application, but instead I'll take a quick look at the other tabs to see the sort of information I'd normally need to provide at this stage.
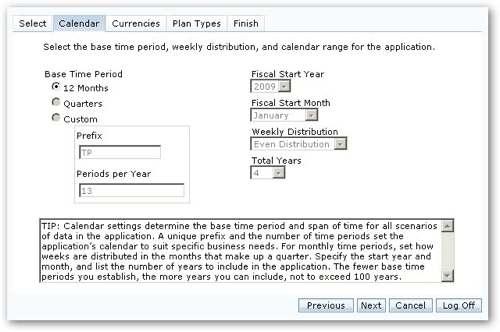
The Calendar tab lets me set up the periods over which I'll be planning and budgeting. One thing to be aware of here is that if you're creating the sample application in 2009, as I am, the creation process will fail later on as there is no 2009 in the same data; to get around this you typically need to set the system clock to 2008 before you create the sample application which will limit its time periods to 2008, avoiding the issue.
The next tab lets you set the currency of your application, and whether multiple currencies will need to be supported. The periods and currencies questions are interesting as they configure three of the eight pre-defined dimensions that Planning works with (the others include accounts, entities (organizational structure), scenarios and versions, with time being divided into periods and years and currencies being the other one). You can add a number of other dimensions to this list later on, using the Planning web-based application, and we'll see the one that the sample application has set up in a moment.
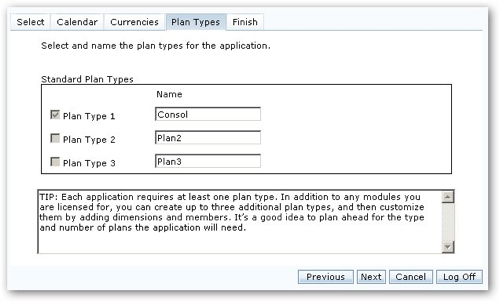
Moving on to the Plan Types tab, each plan translates into a separate Essbase database, held under an Essbase application corresponding to the application name you've just defined in this wizard.
Once all of this has been reviewed, I let the wizard create the application, a process that takes a few minutes to complete. If I was creating my own application, I could use this wizard to get the base application in place including currency support and time periods, going on afterwards to finish the rest of the definition in the Planning web application. Or, I could use the new EPM Architect tool to do this, something we'll look at in later blog postings.
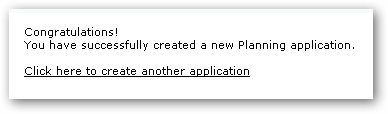
Once you've created the sample application, you can then go back to EPM Workspace, log out and log in again, and this time Planning together with your sample application should be available from the menu.
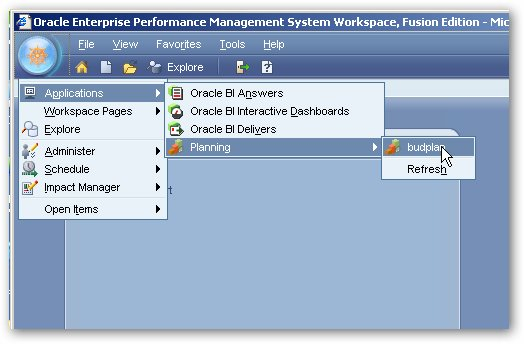
Clicking on the application menu entry brings up the Planning application. We need to use this now to initialize the Essbase database that the Classic Application Wizard just created, which creates the data entry forms based on the seed data contained in the sample application.
Next, I create the Essbase database that will hold my planning data, as at the moment all we have at the Essbase server level is just an application, no databases (aka cubes)
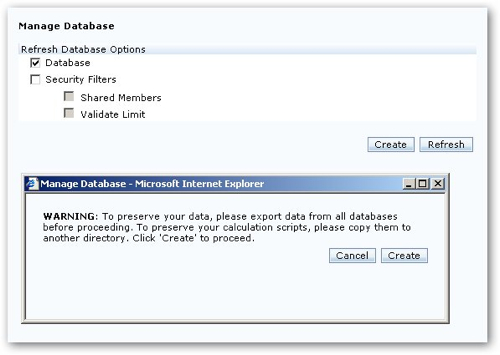
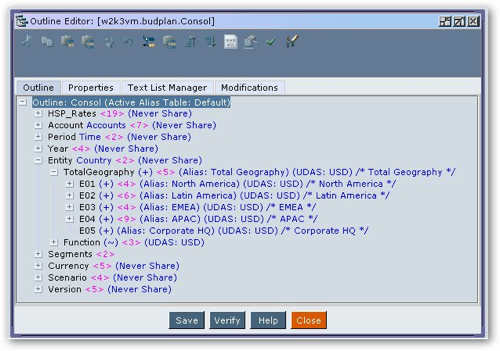
Once the database(s) are created (and if you get an error now, it's probably because you haven't set the system clock to 2008 and you're therefore hitting the issue I mentioned earlier), its time to load some data in. Now in the sample application you are provided with a text file that contains all of the data, which you can load in using the Administration Services interface. Switching over to this tool, you can see the outline for the database we just created - note how in this sample dataset, we're just running with the standard eight dimensions that Planning provides, which have been populated with measures and hierarchies through our choosing the sample application to implement.
Now one thing to bear in mind with Planning is that you're not supposed to edit the database outline directly in tools like Administration Services. Instead, you define dimensions, their hierarchies and their members within the Planning web application (or if you're on the latest version, in EPM Architect), like this:
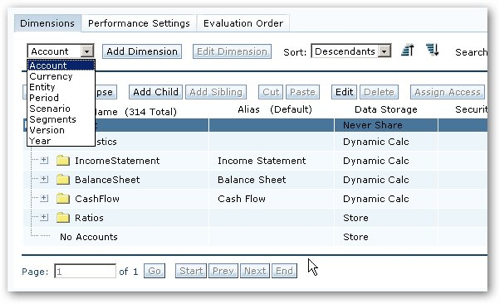
This is also where tools like ODI come in, as you're not going to want to manually define all 50,000 GL Account entries for the Account dimension using a web application like this; what you will really want to do is load the dimension member names in via a text file together with their hierarchies.
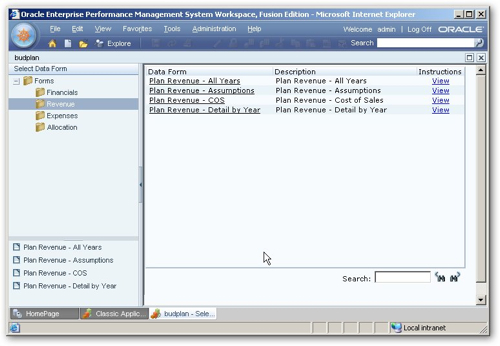
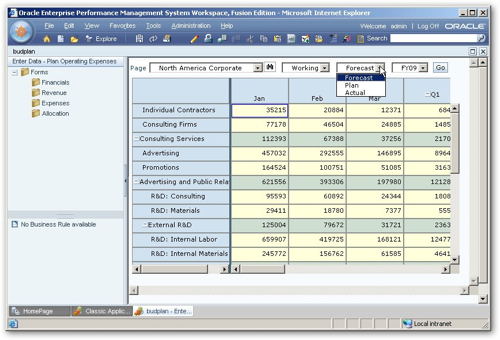
Going back to Administration Services, there's a text file provided with the sample application that contains that initial data for the planning database. To load this in, you run a data load from within Administration Services and then once this is complete, you can go back to the Planning web application and view your data in one of the forms.
Now that all of the initial data is loaded, you can see how the system would look to an end-user by viewing the task list for this application. When an end-user logs in, they will see a list of task steps that they need to complete, that translate to forms or to business processes, like this:
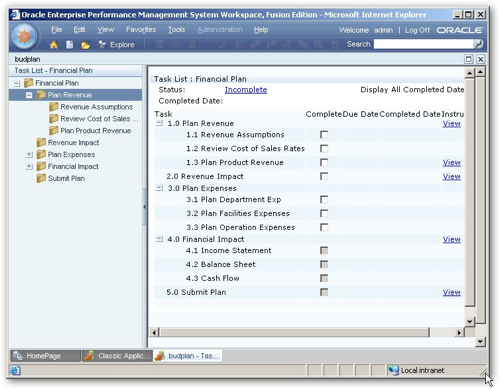
You can also generate these tasks as spreadsheets that can be filled in offline, automated using VBA or otherwise pre-processed by end-users as they work out their budget figures over the range of budget centres they control.
So there you are, a sample Hyperion Planning application. And for the next task, we'll create a new planning application from scratch. Watch this space.