OBIEE Software Configuration Management Part 1 : Initial Deployment from DEV to PROD
I'm currently sitting in speaker ready room at the UKOUG Technology & EBS Conference up in Birmingham, and the team are on the stand now ready to meet people at the exhibition. I've got an hour or so free now this morning, and so I thought it'd be a good opportunity to blog about one of the sessions we're delivering later this week at the conference.
The session I'm thinking about is our OBIEE Masterclass that's running for two hours on the last day of the conference. In previous years we've covered the basics of OBIEE development together with performance tuning tips for the BI Server and the underlying Oracle database, and as we're still waiting for the 11g release to come out, we thought we'd devote this year's session to some of the perennial questions that come up on the forums, on our blog and when we work with customers. We're therefore spending half of the masterclass on OBIEE data modeling questions, specifically how do we model normalized data sources, single-table sources and un-conformed star schemas, whilst the second half of the session is being devoted to software configuration management for OBIEE projects.
Software Configuration Management is a topic that seems to come up on most projects, with customers at least wanting to version control their project and have a means to promote code between development, test and production environments. Now there's not really a defined, standard way to do this with OBIEE projects, and certainly on this blog we've talked about various ways to do this, and others have added to the debate with alternatives and suggestions on how to do things better. We've also had a utility released, the "Content Accelerator Framework", that some people have talked about as being a good tool for promoting changes between environments, and now that OBIEE projects are getting more mature and more "enterprise" we've also had requests for tips on code branching, code merging and other common software configuration management (SCM) techniques.
So this seemed to me a good area to cover in our OBIEE masterclass. As we've got a fair few experts on OBIEE within the company, including people like Venkat J, Adrian Ward, Borkur Steingrimsson and Christian Berg, we had a fair bit of internal debate on what works, what doesn't work and what's practical within a project. If you're interested, I've uploaded the resulting slides here and over the next few blog posts, I'll go through what we came up with, starting in this post with tips on the initial deployment of a project.
To get back to basics though, if you're working with OBIEE on a project, there are a number of SCM tasks that you'll want to carry out:
- We'll want to set up separate development (DEV), production (PROD), and perhaps test (TST) and user acceptance testing (UAT) environments
- We'll then want to be able to promote OBIEE metadata and configuration files between these environments
- You'll want to be able to promote individual reports between environments, and create them for users to use
- You'll typically want to version your project, so that you can identify releases and refer back to previous versions of the project
- You may want to branch the code, or work concurrently on separate but linked projects, and then merge the code back into a single code stream
- The BI Server repository file (the "RPD" file)
- The BI Presentation Server web catalog (the "webcat")
- various configuration files (the BI server .INI files, instanceconfig.xml etc)
- various other artifact files (used for setting up writeback, for example), and
- various web files (CSS etc) if you've customized the dashboard UI
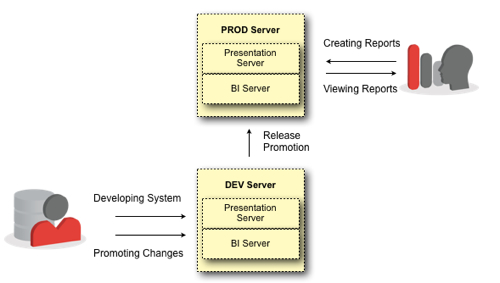
So once you've got DEV and TEST environments set up, and you've developed your initial system in the DEV environment, how do you go about making use of the PROD environment? For us, you can generally divide up code promotion into two stages:
- The initial deployment of the project from DEV to PROD
- Subsequent updates of PROD from DEV, for example new releases of the project
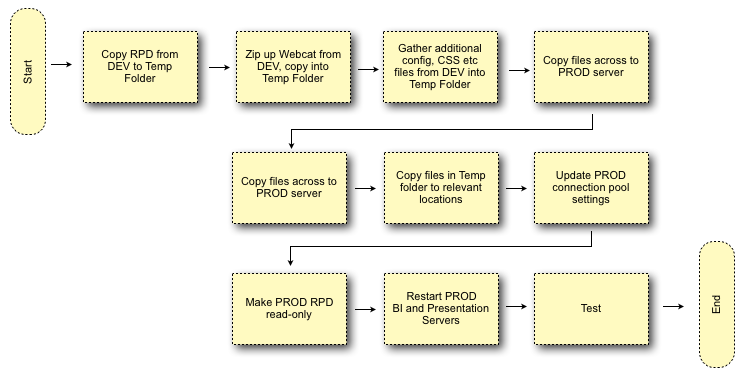
Doing the initial DEV to PROD code promotion is therefore a fairly straightforward process, as there aren't really any decision points, more a series of steps to remember, as shown in the flowchart below:
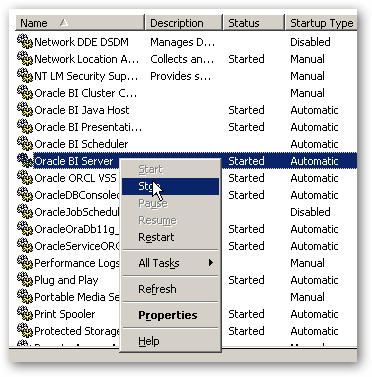
- Create a temporary directory somewhere on the DEV server, into which we'll put all the files to migrate. Shut down the BI Server if the RPD you want to migrate is running online,
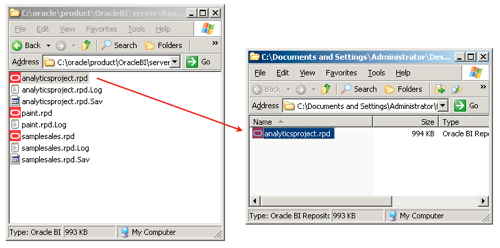
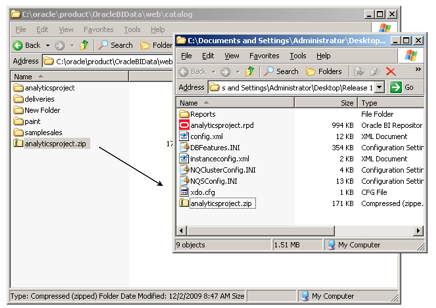
- Now gather up the various configuration, artifact and other files that you need to copy from this environment to the production one. This list isn't exhaustive, but you'd typically want to gather up the following files and copy them into the temporary directory on the development server.
$ORACLEBI/server/config/.
$ORACLEBIDATA/web/config/instanceconfig.xml
$ORACLEBIDATA/web/config/xdo.cfg
$ORACLEBI/web/javahost/config/config.xml
$ORACLEBI/xmlp/XMLP/Users
$ORACLEBI/xmlp/XMLP/Reports
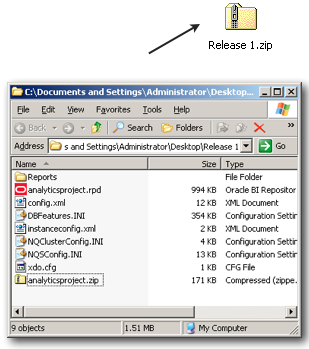
plus any files that you've used to customize the dashboard UI, set up writeback and so on. Once you've done this, zip up the temporary directory ready for transferring to the production server.
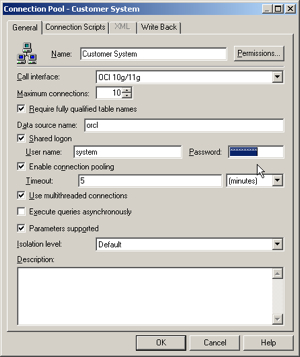
- The RPD that you copied across in step 5 will contain database passwords (and connection details) that may not be relevant in the production environment. If your DBA allows it, you can open up the RPD file and edit the connection pool settings to reflect the production settings.
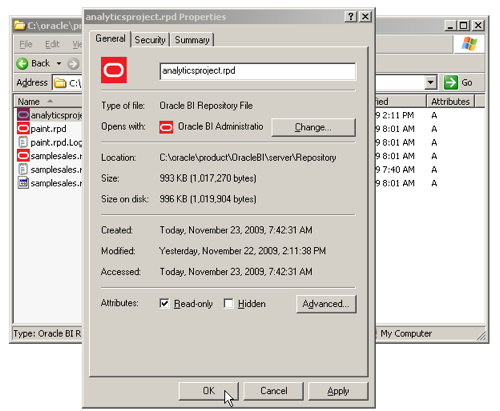
- Now that all of the files are in place, and you've copied the RPD over, set the database password(s) and copied across the web catalog, one step you'll want to consider is to make the production RPD file read-only. This stops inadvertent changes to the RPD in production, though if this is inevitable (for quick fixes etc) you can always make it read-write and apply subsequent changes using the Merge feature recently introduced into the BI Administration tool. If you can though, make the production RPD read-only.
-
Now, in order to pick up all the changes you've introduced with the migrated files, stop and then restart the BI Server, BI Presentation Server, Javahost and BI Scheduler services, and the BI Cluster Controller if you're using clustering.
-
You're now ready to use your system in production. Users can now create new reports in production (within their own User folders, if you ware maintaining the Shared webcat folder in development and plan to overwrite it with each subsequent release), or developers can create reports in the development environment if they are dependent on updates they are making to the RPD, which will be put into production as part of a co-ordinated release.
So that's how we promote the initial release of the project into production. What about subsequent releases, where we have updates to the RPD to promote and potentially some more shared reports and dashboards? Well, we'll cover this in the next instalment of the series.
UPDATE : This posting was amended after initial production with a great tip from Kurt Wolff on easier migration of webcats. Thanks, Kurt.